Chefany

Tuesday, July 6, 2010

Cake decorating 102


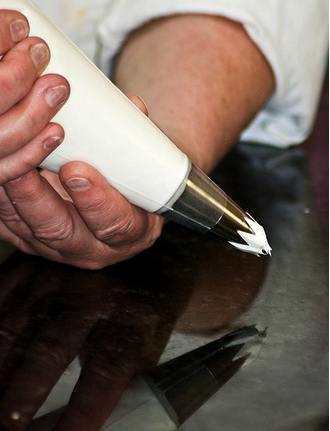
Moving on... next I will show you the reverse shell. Hold your bag at a 30 degree angle but slant it back toward you instead of to the side. There are two ways of doing this one. One shell at a time or a continuous motion. Try both and do what suits you best. 

                                                      
Squeeze out the icing and then curl around to the left then pull straight out to the side making a curl with a tail. Then beginning right on the end of the last one pipe a curl going to the right. One is curled up and the other curled down. Now try doing this in one continuous motion, curl around left, pull out then right pull out...keep going...
Let's try the emotion next. This is easier just make a small curl and pull out a little and the curl and pull out. In one continuous line. 
Here you can see I did it with both the large tip and then with a small #21 tip. 
Now we will do the rosette. Keep this one tight for a more consistent appearance. 
Holding your bag vertical to the cake (or table) squeeze out, wrap around, release but keep the motion going around so the tail wraps around. 


And the last one is the fluer de lis. Doing this one on the table is much different than on a cake. If you are making it on top of the cake the movement is similar but if you want it on the side of the cake you need to make it so it hangs down. This looks better and you can cover the end at the edge of the cake this way. 
First pipe out a long tailed shell. Then like on the reverse shell pipe one curl on one side of the shell overlapping the end with the end of the shell and then on the other side curl the other way and overlapping the end on top of the last two... 
Ok, so now you have several boarders you can pipe onto your cake. Here is what it looks like piping directly onto the edge of a cake. Remember to stay just on the edge. Don't go to far over or your boarder will drop off and don't go inside or you will use up all  your space for flowers and writing!


Happy decorating! And check out Aprils page she took all these great photos for me.
http://aprilshomecooking.blogspot.com


Monday, July 5, 2010

Cake decorating 101

I was fortunate to have a very good photographer in my last cake decorating class at Cabrillo! She took blow by blow shots of what I was demonstrating so I can post this and you can use it as a guide for practicing. One of my current students at the PCI said to me the other day that she is a very visual learner and wished I had a video of the demo she could refer to. I then remembered these great photos! So YEAH, why not write a blog for all you who want to improve their piping skills!
Here we go, but keep in mind two things... one I am icing a styrofoam dummy cake, and two I am using a huge tip for demonstration purposes. You should be using a #21 or any small star tip in the 20-30 number range.

Icing the cake is probably the most difficult part of cake decorating. You must learn to properly use the icing tools. Whether you prefer the icing spatula or the icing blade. It takes the proper amount of pressure to get a smooth and even icing. When applying the icing you want to use a firm pressure but when smoothing you lighten up on the spatula. Use the tip of the spatula to apply and then the edge to smooth. Even if you switch to the icing blade the slanted edge will give you the smooth surface you want. 


Once you have a smooth and even icing you need to be able to pipe consistent boarders. This takes practice using the piping bag and tips. Here I will show you how to use the star tip in several ways. 
Holding the bag properly will help you get consistent piping.
 
Never fill your bag more than half full! Twist the top of the bag tightly and hold the twisted top between your thumb and first finger then wrap the other three fingers around the ball of icing at the top of the bag. Squeeze from the tips of your fingers to the palm of your hand. With the opposite hand guide but do NOT squeeze as you pipe out your design. Keep the bag twisted tightly as you use up the icing. 
This is the simple shell. Holding your bag at a 25 degree angle squeeze out, push forward very slightly pull back and then release. Pipe several lines of this to practice until you can make them all the same size and shape. Whether you want short little shells or long large ones it doesn't matter what matters is that they are all the same!


I have twenty some photos so I am going to write this blog is sections so you can choose which one is best for your level. Next I will post reverse shell, rosette, and e-motion. Then the last one will be putting these to use on the edge of your cake! Stay tuned!