Chefany

Tuesday, April 27, 2010

The first day of cake decorating class, chiffon cake and swiss buttercream

I have been an instructor at Cabrillo College since 1989. When I accepted the position at the school that I teach at in Campbell in 2005, I gave up all my classes to a wonderful instructor that has enhanced the program with her enthusiasm and knowledge. I have missed the community feeling that I had when teaching at a local community college. I love the small classes that I teach now but the larger and more local classes are fun with folks who know each other and share experiences as well as their projects and kitchens. 
I am back for one eight week course, teaching cake decorating and just loving the excitement of the students to learn from me! On the first day, I brought in a cake, some icing and filling. I cut filled and decorated the cake you see here. For those decorating enthusiasts, I will go over what I demonstrated on the first day of class, with a few pictures to enhance the story. 


I began with cutting a 10" chiffon cake in three layers, showing the students how to correctly use the serrated knife and turntable. The next step which is optional depending on what filling you are using for your cake, is to paint a simple syrup onto each layer. Simple syrup is just that, one part sugar to one part water brought to a boil and then shut off and cooled. Flavors such as liqueur or fruit juices can be added for flavor but the plain syrup will add sweetness and moisture to your cake, preventing it from drying out.


I then flavored my buttercream with a fortified caramel that I had made by just mixing the two together with a whisk. I always flavor my icings according to taste since each cake will have it's own characteristics and this one I wanted to have a good caramel flavor to the icing to compliment the raspberry jam filling that I add. 


I know, I know, you want the recipes, right??? I will post them at the end just for YOU!
When the icing is all whipped up then I ice the cake with a smooth and even icing. As I do this I always hear moans and groans from the class since I "make it look so easy". WELL, it's my job!! Icing a cake is probably the most difficult part of cake decorating. It takes practice and messing up before it comes easy. So practice, practice, practice! This means you get to make many cakes, so what's wrong with that???


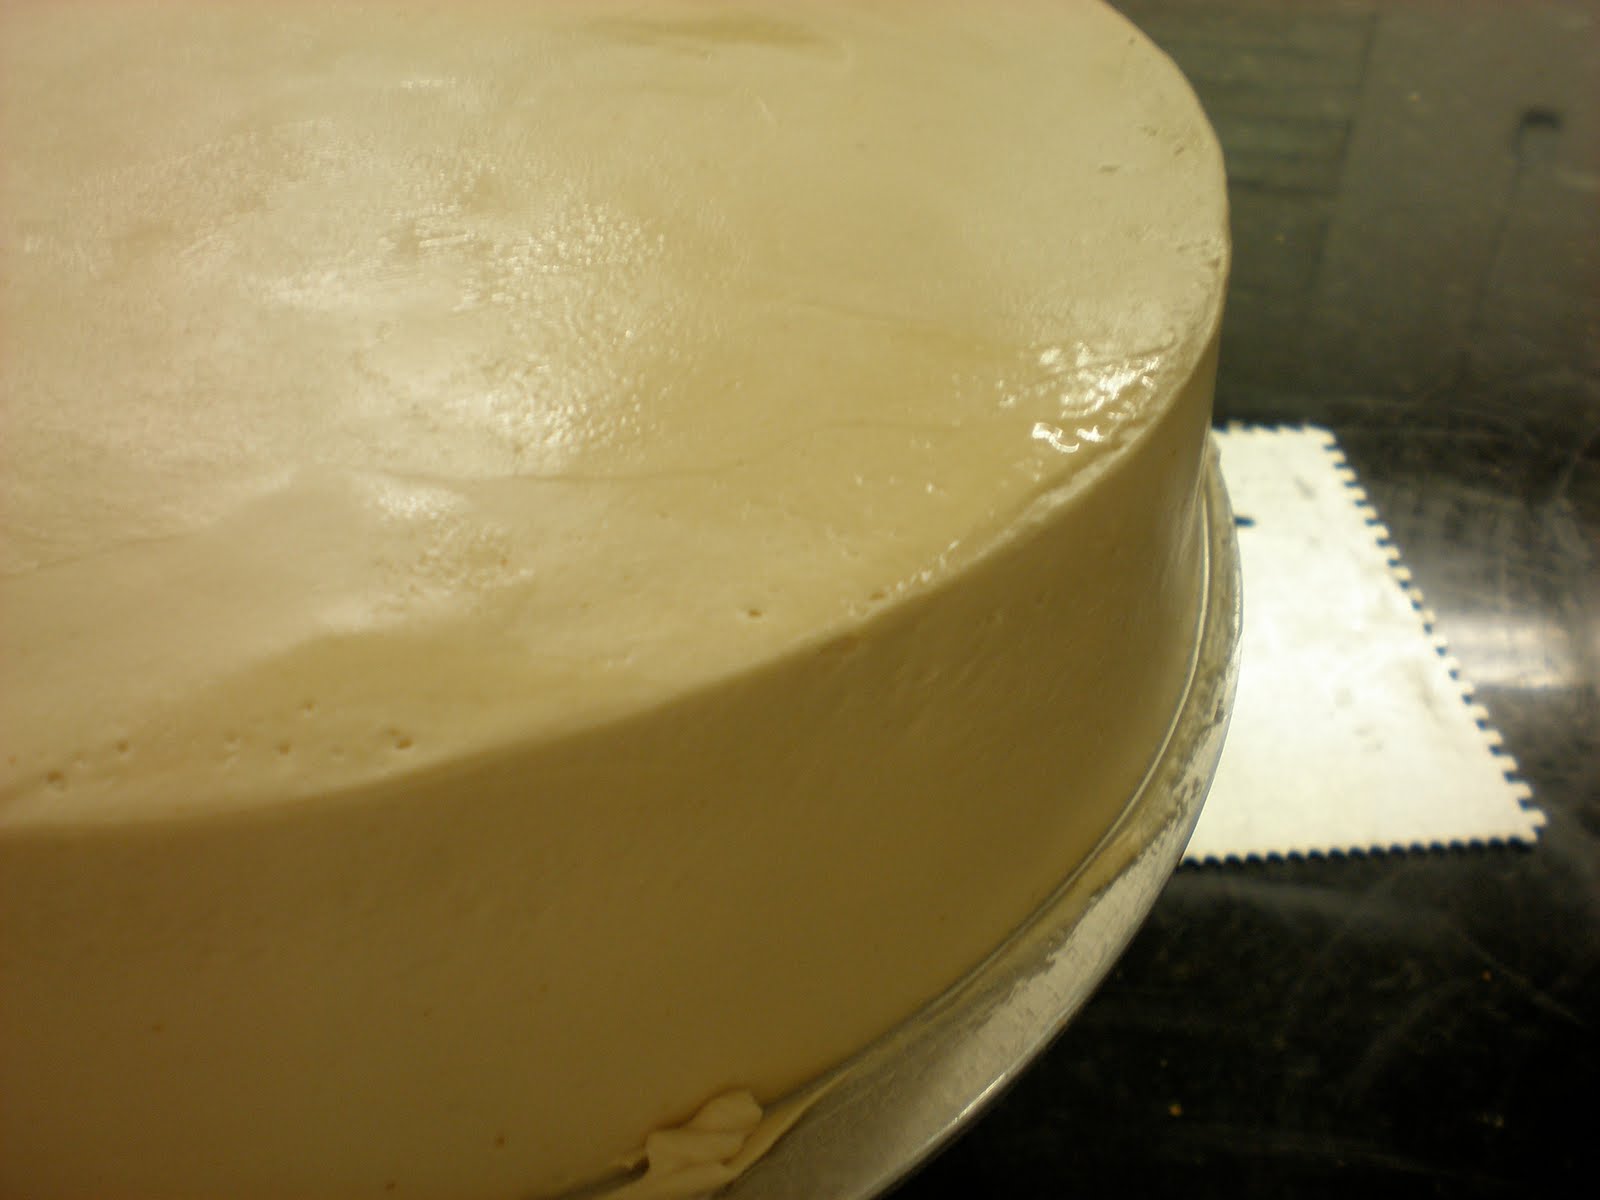
Using a hot knife when you get it to an even place will remove all those last little spatula marks to make a very smooth coating. 
Then you begin to decorate what you wish. I demonstrated several different techniques to get the class pumped up to practice. So we have here, the reverse shell, the classic shell, roses, buds, leaves and writing all in the caramel buttercream. Roses can be made with a real butter icing but you have to be quick! Butter melts at a very low temperature so hot hands are your enemy. If I am hot or the room is warm I may use a bowl of ice water to dip my hands into periodically to help. If you put your bag of butter icing in the refrigerator it will get cold and hard on the outside and stay soft in the center and then you have lumpy bumpy icing. Not a nice thing to work with so that is not recommended. 


I asked the class if anyone just had or will have their birthday very soon and Olaya said she had just had hers so I made her a cake and we all enjoyed eating it! 
Here are the recipes for the chiffon and buttercream:
Swiss Meringue Buttercream Ingredients
Makes about 4 cups

4 large egg whites
1 1/4 cups sugar
1 cup unsalted butter, (2 sticks), softened, cut into tablespoons

2 tsp. vanilla

Directions
Put egg whites and sugar into the top of a double boiler over a pan of simmering water. Whisking constantly, cook until sugar has dissolved and mixture is warm (about 160 degrees).

Pour heated egg whites into the bowl of an electric mixer fitted with the whisk attachment. Beat egg white mixture on high speed until it forms stiff (but not dry) peaks. Continue beating until fluffy and cooled, about 7 minutes.
Switch to the paddle attachment. With mixer on medium-low, add very soft butter two tablespoons at a time, beating well after each addition. Increase speed to medium-high; continue beating until frosting appears thick, about 3 minutes. Reduce speed to low; add flavoring and continue beating 2 minutes to eliminate air bubbles.

Be sure to wait until the meringue has cooled a bit before adding the butter. If the meringue is too hot you will have butter soup and if it is cold and the butter is too cold it will look like cottage cheese. The soup is difficult to remedy but the cottage cheese can be fixed by adding a bit of heat to the bowl and whisking until smooth and creamy.

Vanilla Chiffon

1/2 cup Granulated sugar
7 each Egg whites
1 cups Granulated sugar
1-1/2 cups All purpose flour
1 Tbls. Baking powder
4 each Egg yolks
1/2 cup safflower oil
3 oz. Water
2 Tbls. Vanilla extract

Making the chiffon cake
Place the egg whites into the bowl of an electric mixer and whip until foamy. Gradually add 1/2 cup of sugar and whip to medium-soft peak.

Combine the remaining cup of sugar with the flour and baking powder and sift together twice. Combine the egg yolks, oil, water and vanilla extract and stir into the dry ingredients one cup at a time.

Fold 1/3 of the whipped egg whites into the batter mixture then fold the result into the remaining whipped egg whites.

Butter and flour two 10" spring form pans and divide the batter evenly between the two. Bake at 400 F. for 15 to 20 minutes then check to see if the cake will pull away from the sides of the pans. Cool and remove from the cake pans.

Wednesday, April 14, 2010

Rose's Passion cake completed!

Ok so NOW for the syrup...
Oh BTW, I met Rose and Woody her fab assistant yesterday at the Baker's Dozen meeting in San Francisco and what a great event!

Rose offered for us to make one of 10 different recipes from her book and I made this one!
And others made pound cakes, cheesecakes, chocolate cakes, angel cakes... and we feasted! What I loved was comparing two other people's passion cakes to mine. All three had their merits but one of the members, David said, "I think I like this cake, your filling and my soak..this would have been the perfect cake!" Funny how all three were so different... I know what I did differently than the recipe, I used all cake flour instead of cornstarch and cake flour mixed. Next time I will do that since the cake made with the mix was noticeably lighter in texture.
The other two also made more cake and stacked it up with three and four layers, I used the one specified in the recipe which I thought worked out fine.
Also, at the event they passed out literature on the Perfect Puree that is now sold at specialty stores (all over California, anyway)... The Whole Foods carries it in the frozen food section and they seem to be in almost every state so if you have one of those try there for the passion fruit and other fruit purees.
They are great to work with and you get a fresh fruit flavor as opposed to artificial flavorings.

OK, BACK TO THE RECIPE!!
Passion Fruit syrup

1/2 vanilla bean or 1/2 teaspoon pure vanilla extract
3/4 cup sugar
1/2 cup passion fruit puree plus 2 Tablespoons measured separately

In a small saucepan with a tight fitting lid, place the sugar, and rub the vanilla bean seeds into the sugar with your fingers. Add the pod, the 1/2 cup of puree and stir until the sugar is moistened. Bring to a roiling boil and then turn off the heat, cover with the lid and let cool completely. Transfer the syrup to a cup with a spout, like a glass measuring cup, and add the 2 Tbl. of extra puree.

WHITE CHOCOLATE BUTTERCREAM

This buttercream is made in two stages, first the white chocolate custard and then the completed buttercream.

Custard Base
3.5 ounces white chocolate with cocoa butter
3 1/2 Tablespoons unsalted butter
1 large egg
1 large egg yolk (eggs at room temperature)


In a double boiler over barely simmering water melt together the butter and the white chocolate.
Stir until smooth and creamy, don't let this get too hot or it will break...
Whisk the egg and yolk together and then add it to the white chocolate mix. Continue stirring until the mixture thickens slightly. An instant read thermometer should read 140F
Remove it from the heat, transfer to a bowl, and allow to cool to room temperature, stirring occasionally.
You can cover the bowl and refrigerate to speed up the cooling process. The mixture should be 65F - 70F on the thermometer when it is ready to add to the following:

Completed white chocolate buttercream
6 ounces cream cheese
3 1/2 Tablespoons unsalted butter (room temperature(
1/2 tablespoon sour cream (or creme fraiche)
white chocolate custard base
1/4 tsp. vanilla extract

In a bowl of a stand mixer fitting with the whisk, beat the cream cheese and butter on medium speed. Beat in the sour cream or creme fraiche until very smooth. Stop the mixer and scrape the sides if needed.
Gradually beat in the cooled custard base and vanilla. Raise the speed to medium high and beat until smooth, light and creamy.

Compose the cake:

Using a long serrated knife and your fingertips to remove the top crust.
Remove the parchment and scrape off the bottom crust.
Clean the knife and cut the genoise in half horizontally.

Brush or pour the syrup onto each layer of the cake. The cake will be very tender now and must be supported by a removable pan bottom or a cake cardboard when moving them.
Spread 3/4 cup of the curd over the bottom layer. Then top with the other layer.
Ice the cake with the buttercream and swirl the top with a small icing spatula. Refrigerate for about one hour and then apply small dabs of any remaining passion curd, and with the metal spatula, swirl them into the buttercream.


Serve at room temp or cold from the fridge... it will knock your socks off!!

Monday, April 12, 2010

The passionfruit curd and syrup for Rose's cake

Passion fruit puree or fresh passion fruit is not easy to find around here... I purchase it through a wholesaler that will sell to the public with an advance order... check on line too. There are specialty food markets online that carry fruit purees. They are kind of expensive but stay in your freezer for just about ever...

Rose's classic Passion Curd
3 large egg yolks
1/2 cup sugar
3 Tablespoons unsalted butter (room temperature)
4 ounces (1/2 cup) passion fruit puree (you would need 6 very ripe fresh fruits to make this)
pinch salt

In a heavy saucepan, mix together the yolks, butter, and sugar. Whisk 5 Tablespoons of the passionfruit puree and the salt into the mixture. Cook on medium-low heat stirring constantly with a silicone spatula being careful to scrape the sides of the pan, until it has thickened and resembles hollandaise sauce, which thickly coats the spatula but is still liquid.
Do not allow the mixture to come to a boil or it will curdle. When the curd has thickened and will pool thickly when a little is dropped on it surface, pour it all at once into a strainer and press it through with the spatula. Gently stir in the remaining 3 Tablespoons of puree and allow the curd to cool for 30 minutes. Cover and refrigerate until cool completely. The curd keeps in a airtight container or jar for 3 weeks refrigerated...

White Gold Passionfruit cake from Roses' Heavenly Cakes

Here it is...so succulent and tasty! When I talk about the YUM factor, I mean this! A perfect example of YUM! I truly adore passionfruit and this cake has everything I love about it, tart, tangy, sweet, fragrant and tropical. What makes this cake extra amazing is the passionfruit yumminess is suspended in an ultra light genoise and iced in a sweet creamy white chocolate cream cheese icing! Oh my, just writing this makes me want to grab a slice! BUT NOOOO I can not! This will be presented at the Bakers Dozen meeting where the dear Rose Levy Beranbaum will be our guest of honor. So I must wait...must wait...
The recipe has several steps but the good news is many can be made ahead so you can get ready to assemble when all is done.
First you have the cake: Vanilla Genoise
Then you will make the filling: Passionfruit curd
Now you can make the syrup for soaking: passion syrup
And then of course, the icing: White chocolate cream cheese buttercream

I made of video of me cutting, filling and icing the cake so you can see that in action! But it may take me a couple of days to edit it and put it up on my you tube channel...it is the ichefany channel if you are interested.. but the ones I have done so far are on this blog for your viewing pleasure.

The cake:
3 Tbl. clarified butter, or Beurre noisette (browned butter)
1 teaspoon pure vanilla extract
4 large eggs
1/2 cup fine sugar
3/4 cup wondra or *cake flour (I used 3.5 oz cake flour) lightly spooned into the cup and leveled off.

The recipe says to use a 9" x 2" round cake pan, sprayed with pan spray and lined with parchment. All I had was an 8" x 3" so I used that and it worked out fine.
Preheat your oven to 350F.
Prepare your butter, add the vanilla and keep warm.
In the bowl of an electric mixer, using a wire whisk, mix together the eggs and the sugar.
Set the bowl over a pan of simmering water and heat just until lukewarm to the touch, stirring constantly to prevent curdling the eggs.
Attach the whisk beater. Beat the mixture on high speed for a minimum of 5 minutes. The mixture will more that quadruple in volume and be very thick and airy. (A hand held mixer may take as long as 10 minutes)
Remove almost one cup of the egg mixture and whisk it into the melted butter.
Sift about half the flour over the remaining egg mixture and I used a silicone spatula, fold it in gently but rapidly until almost all the flour has disappeared. Repeat with the rest of the flour until all traces of flour have disappeared.
Fold the butter mixture just until incorporated. With the spatula, reach into the bottom of the bowl to be sure to moisten all the flour. Pour the batter into the prepared pan.
Bake for 20 - 30 minutes or utnil the cake is golden brown and start to shrink slightly from the sides of the pan.  This is a delicate cake so avoid opening the oven until just before it is done. It should spring back when lightly touched and will not leave fingerprints in the crust.
Rose states: To prevent the collapse of it's delicate foam structure, while still hot, the genoise must be unmolded as soon as it is baked. Have ready a small metal spatula and a wire rack lightly coated with cooking spray.
Ok, this is ultra careful... I always take my cakes out of the pan 10 minutes after they come out of the oven and I did with this one as well... with no ill effects... however, I did use cake flour and no cornstarch so this could have given my cake a bit more structure.
Run the small metal spatula around the edge of the cake being careful not to cut into the cake. Invert the cake onto the cooling rack.
Leave the paper on and immediately reinvert the cake onto the rack so that the firm upper crust keeps it from sinking. (I didn't have this problem but again...cake flour)
The cake should be 2" high. (Mine was a little taller because of the smaller pan, not much though)
Oh dear gotta go to work now... I will finish this tomorrow, I promise!! Anticipaaaaaaaaaa....tion!

Sunday, April 11, 2010

Bloggers block... broken!

Ok so I am pretty new to this blogger thing... and at first was excited to share all my knowledge and information about baking. I still am really... but for some reason have a big old block as to what to write about... I don't know how this happened to me really since baking is my life and that is about all I do that is interesting to talk about... but at this point in my blog I am at a loss...
But WAIT! As I sit here complaining that I am stuck I am realizing, tomorrow I am making a fabulous cake for Rose Levy Beranbaum (of the Cake Bible and now Rose's Heavenly Cakes...fame) who will be the guest at the Bakers Dozen meeting on Tuesday! WOOOO HOOOO material :) Oh joy!
And to top it all off it is a passionfruit cake with a white chocolate cream cheese icing! I just posted two fabulous desserts on my facebook page that featured passionfruit (lilikoi in Hawaiian) and many asked for recipes... so I guess I can share Rose's recipe for this incredible cake. I made it last week in class to try it out and couldn't stop putting it in my mouth! That is a very good sign, you want a dessert to be so good you can't stop eating it! That is my measure for a great dessert.. or any great food actually.
So stay tuned... I will photograph, bake and assemble tomorrow! I will then write about the deliciousenss of this passionate cake!
EXCITED NOW!!! I will post one of the desserts we made in class that has passionfruit curd and a greek yogurt mousse with a passion soaked sponge cake and glaze. Just to get you into the mood!